
Most guides to ‘building a Shopify store’ start at the theme picker and end at the checkout test. That’s maybe 40% of what actually determines whether a launch succeeds. The other 60% — validating the idea, defining requirements, planning information architecture, and testing properly — happens before a single theme file gets touched or after the store technically works but isn’t actually ready. This is the gap a good Shopify web development company is built to close: not just executing the build, but managing the full sequence so nothing important gets skipped.
This guide walks through that full sequence, stage by stage, the way an experienced project lead would actually run it — not a marketing overview of what Shopify can do, but the operational process of getting from an idea to a store that’s genuinely ready for customers. This guide is written for founders and business owners who are planning to start a Shopify project, whether they’re building it themselves, hiring a freelancer, or briefing an agency, and want to know what should happen at each stage so they can tell whether their own project is on track.
By the end, you’ll know what belongs in each stage, roughly how long each one takes, what it typically costs, where the process branches depending on what kind of store you’re building, and which shortcuts reliably cause problems later. Let’s start with the full picture.
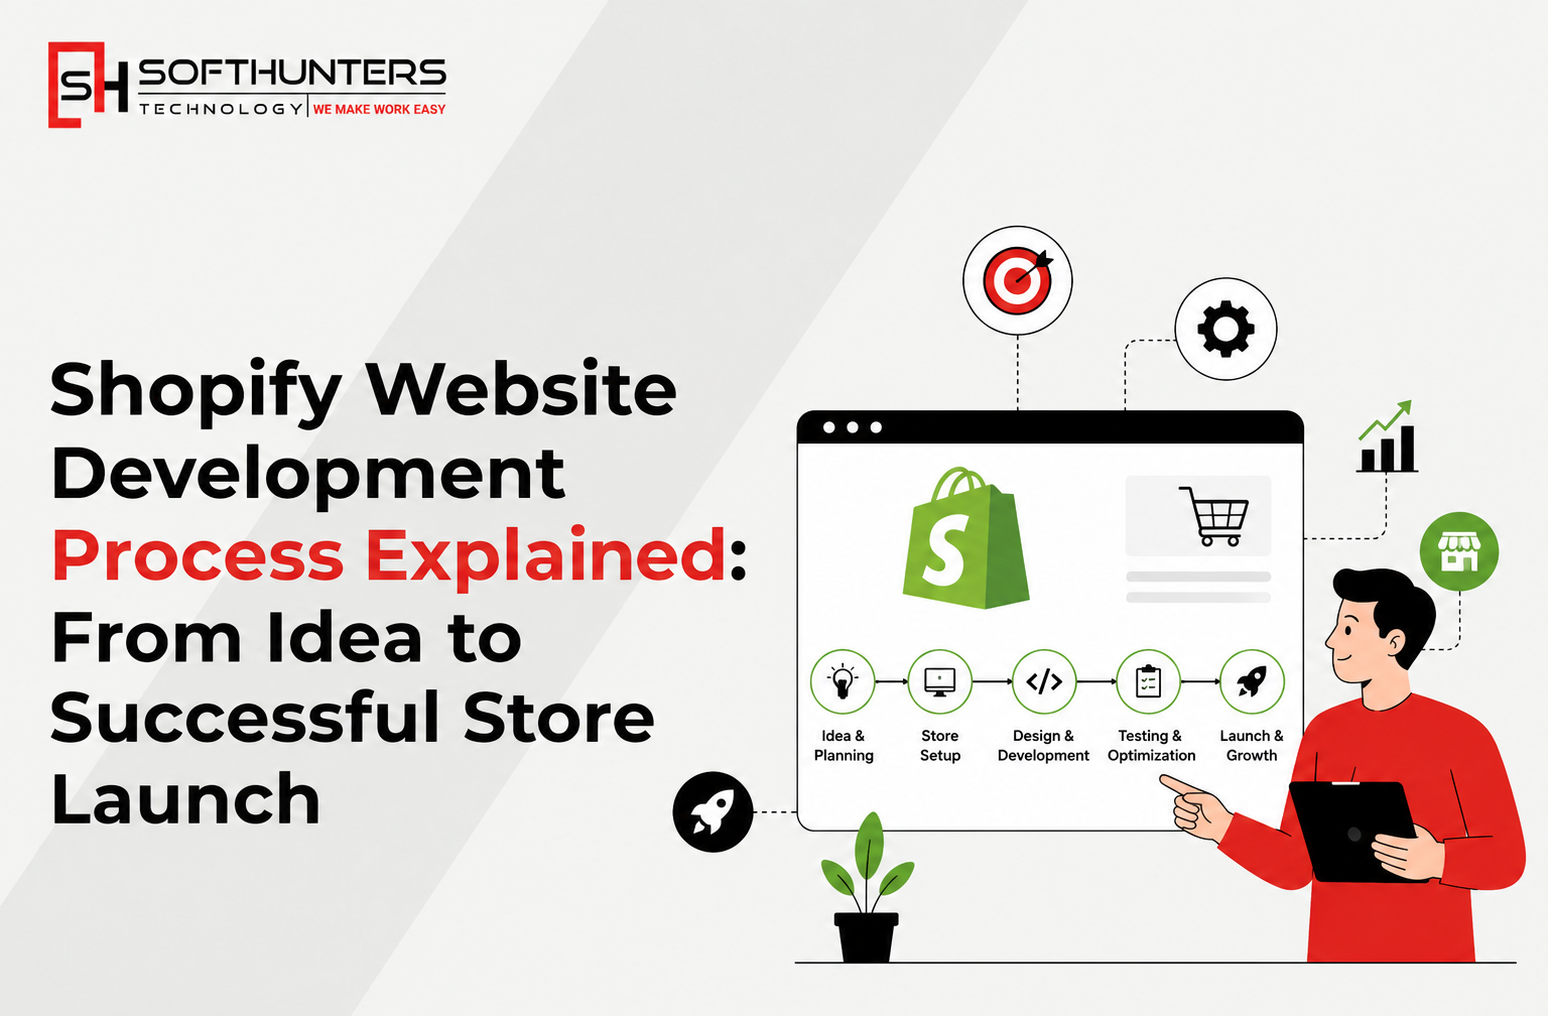
The Full Process at a Glance
A Shopify build isn’t really one project — it’s a sequence of distinct stages, each with a different focus and a different person best suited to lead it. Seeing the whole map up front makes it easier to spot where your own project actually is, and what’s coming next.
| Stage | Core Focus | Typically Led By |
| 0. Discovery Workshop | Business goals, KPIs, scope | Strategist / Project Lead |
| 1. Idea Validation | Market research, demand testing | Founder / Marketer |
| 2. Planning & Requirements | Scope document, budget, timeline | Founder / Project Manager |
| 3. Plan & Setup | Shopify plan, domain, payments | Founder / Developer |
| 4. Store Architecture | Collections, navigation, URLs | Developer / Strategist |
| 5. Theme Selection & Design | Visual design, branding | Designer / Developer |
| 6. Development & Customization | Liquid, custom features | Developer |
| 7. Apps & Integrations | Third-party tools, ERP/POS | Developer / Project Manager |
| 8. Content, Product Data & SEO | Copy, photos, metadata | Content Team / SEO |
| 9. Testing & QA | Functional and performance testing | Developer / QA |
| 10. Pre-Launch Checklist | Final review before go-live | Project Manager |
| 11. Launch Day | Going live, announcing | Whole team |
| 12. Post-Launch Monitoring | Early fixes, first-month data | Founder / Developer |
Notice that development (Stage 6) is only one of thirteen stages. Most first-time store owners — and, frankly, some inexperienced developers — treat “building the Shopify store” as synonymous with that one stage. The stores that launch smoothly are the ones where every stage before and after development gets the same level of attention.
Who Is Involved at Each Stage?
One reason projects stall is that nobody has clarified who owns which decision. Roughly mapped to the stages above:
● Founder / business owner — owns Stages 0–2 (goals, validation, requirements) and Stage 12 (post-launch decisions). No one else can define what success means for your business.
● Project manager/account lead (agency projects) — owns coordination across every stage, keeps the requirements document from Stage 2 aligned with what’s actually being built, and manages the handoff between design, development, and QA.
● Strategist / UX or IA specialist — owns Stage 4 (store architecture) and contributes heavily to Stage 0; this role is easy to skip on smaller projects, which is exactly where navigation and URL-structure problems tend to originate.
● Designer — owns Stage 5 (theme and visual design), working from the architecture defined in Stage 4.
● Developer — owns Stages 6 and 7 (customisation, apps, integrations) and is heavily involved in Stage 9 (testing) and Stage 3 (initial technical setup).
● Content/SEO specialist — owns Stage 8 (product data, copy, on-page SEO), ideally working in parallel with development rather than after it, since content gaps are one of the most common launch delays.
On small projects, one or two people wear several of these hats — which is fine, as long as each hat still gets worn. The most common failure mode isn’t having too few people; it’s skipping a role entirely (usually the strategist or the dedicated QA pass) because no one was explicitly assigned to it.
Client Involvement at Each Stage
Even on a fully outsourced build, the client isn’t a passive bystander — each stage needs something specific from you to move forward without stalling. Here’s what that looks like in practice:
| Stage | What You Need to Provide or Approve |
| 0. Discovery | Participate in stakeholder interviews; confirm goals, KPIs, and revenue model; sign off on the final scope brief |
| 1. Idea Validation | Share existing market/customer knowledge; approve the validation approach and budget for it |
| 2. Planning & Requirements | Review and approve the requirements document; confirm budget and timeline are realistic |
| 3. Plan & Setup | Choose the Shopify plan; provide business and domain details; set up billing |
| 4. Store Architecture | Review and approve navigation, collection structure, and URL decisions before design starts |
| 5. UI/UX & Design | Provide brand assets (logo, fonts, colors, photography if available); approve visual direction before development begins |
| 6. Development | Be available for clarifying questions; review progress at agreed milestones, not just at the end |
| 7. Apps & Integrations | Provide access/credentials for ERP, POS, or existing tools; approve which apps get installed |
| 8. Content & SEO | Supply or approve final product photography and copy; confirm keyword priorities if SEO-led |
| 9. Testing & QA | Participate in user acceptance testing (UAT); personally place test orders rather than relying on the build team alone |
| 10. Pre-Launch Checklist | Do a final walkthrough and give explicit sign-off before the password page comes off |
| 11. Launch Day | Be available for launch-day issues; execute your side of the announcement (email list, social, personal network) |
| 12. Post-Launch | Review early performance data; prioritize fixes; decide on an ongoing support arrangement |
The pattern worth noting: client involvement is heaviest at the start (Stages 0–2) and end (9–12), and lightest in the middle (4–7), where the team is largely executing against what was already approved. A project where the client is either absent at the start or silent through testing is a project heading for a rough launch.
Step-by-Step Shopify Website Development Process
Stage 0 — Discovery Workshop and Business Strategy
Discovery is the most commonly skipped stage on small projects, and the most consistently emphasised stage in how professional agencies actually operate. It’s a dedicated period — commonly two to four weeks on agency-led projects, scaled down to a few focused hours for a small store — where goals, constraints, and scope get defined before any design or development starts.
Projects rarely go over budget or miss deadlines because of the technology; they go over because groundwork that should have happened in discovery gets skipped and surfaces as a problem mid-build instead.
● Business goals and KPIs. What does this store need to achieve, and how will you measure it — revenue target, conversion rate, average order value, a specific launch date?
● Target audience. Who is actually buying, and what does their shopping behaviour look like (mobile vs. desktop, one-time vs. repeat, price-sensitive vs. brand-loyal)?
● Competitor analysis. What are comparable stores in your category doing well or poorly — this directly informs Stage 4 (architecture) and Stage 5 (design) decisions later.
● Brand positioning. What makes this store different, and how should that show up in design, copy, and merchandising decisions?
● Revenue model. Straight D2C, wholesale/B2B, subscription, or a marketplace hybrid — this single decision affects which Shopify plan you need (Stage 3), how your store architecture should work (Stage 4), and which apps are essential (Stage 7).
● Must-have vs. nice-to-have features. The same distinction, covered in detail in our Shopify hiring guide — separating what the store cannot launch without from what would be nice is what prevents scope creep later.
● Budget and timeline alignment. Confirming that the goals from this workshop are actually achievable within the budget and timeline available — before anyone commits to either.
● Defining project success. A specific, written definition of “done” that everyone — founder, developer, designer — agrees to before work starts.
A well-run discovery session typically includes stakeholder interviews, a technical and analytics audit if you have an existing store, and produces a scoped brief from which the rest of the project will be built. It’s the same documentation exercise recommended in Stage 2 below, just run earlier and with more structure on larger projects.
Stage 1 — Idea Validation and Market Research
Before building anything, confirm there’s real demand for what you’re selling. This doesn’t require a formal study — a landing page collecting pre-orders or email signups, a small paid ad test, or direct outreach to a target customer segment can validate interest for a few hundred dollars before you spend thousands on a full build.
Competitor and niche research at this stage should look at more than just pricing: how competitors structure their product categories, what their checkout experience looks like, and what customers complain about in their reviews — these are free sources of information about what to do differently.
Decide early whether you’re building a D2C brand, a wholesale/B2B operation, a subscription business, or some mix, since this shapes almost every decision downstream, starting with the Shopify plan you’ll need in Stage 3.
Estimate realistic startup costs before committing — not just the development cost covered later in this guide, but inventory, photography, initial marketing spend, and the first few months of app subscriptions. Underestimating total launch cost, not development cost specifically, is one of the most common reasons early-stage startups run out of runway before they gain traction.
Stage 2 — Planning and Requirements Definition
This stage turns Stage 0 and Stage 1’s findings into an actual working document — the same one-page brief recommended in our Shopify hiring guide, covering business goals, must-have vs. nice-to-have features, budget and timeline, required integrations, and success metrics. If you skipped a formal discovery workshop, this is where that thinking needs to happen regardless.
This is also where you decide who’s building the store: DIY through Shopify’s own tools, a freelancer, an agency, or an in-house hire. That decision — and the cost and timeline benchmarks that go with it — is covered in full in our companion guide to hiring a Shopify developer or agency. The short version: a well-scoped, single-skill project suits a freelancer; a multi-skill project (design, development, migration, integrations all at once) suits an agency; and full-time in-house hiring rarely makes financial sense until a business has enough continuous development work to justify it.
Stage 3 — Choosing Your Shopify Plan and Initial Setup
As of 2026, Shopify’s core plans are Basic ($39/month, or $29/month billed annually), Grow ($105/month, or $79/month billed annually), Advanced ($399/month, or $299/month billed annually), and (from roughly $2,300/month on a multi-year term).
A Starter plan at $5/month exists for social/link-in-bio selling without a full standalone storefront, and a new $0/month agentic plan — pay-per-completed-sale only, no storefront — lets non-Shopify merchants sell through AI assistants like ChatGPT, Gemini, and Copilot.
One detail worth flagging before you default to Basic: as of 2024, Basic no longer includes any staff accounts at all — the store owner is the only login — so any business bringing on even one additional team member needs Grow at a minimum. Foundational B2B functionality — company accounts, wholesale pricing, up to three catalogues — is now included on every plan tier, not just Plus, following Shopify’s April 2026 update.
Match the plan to what you defined in Stage 2, not the other way around: don’t upgrade to Advanced for reporting features you won’t look at in month one, and don’t undersell yourself on Basic if you already know international selling or complex B2B logic is coming in year one.
● Domain purchase and connection. Buy through Shopify or connect an existing domain; Shopify provisions SSL automatically once connected, but allow a few hours for it to activate.
● Payment gateway. Shopify Payments avoids the extra transaction fee (0.2%–2% depending on plan) that applies when using a third-party gateway instead; most stores should default to Shopify Payments unless there’s a specific reason not to.
● Staff accounts and permissions. Set up scoped staff/collaborator accounts from day one rather than sharing the owner login — this matters even more once a developer or agency is involved, since it’s the difference between revocable, auditable access and a shared password nobody remembers to change later.
Stage 4 — Store Architecture and Information Design
This is the strategist role called out in the “Who Is Involved” section, and it’s the stage most likely to get skipped on smaller projects — usually because it doesn’t produce anything visually exciting, just a plan. Skipping it is also one of the most expensive mistakes to fix later, because architecture decisions are baked into URLs, navigation, and how products get filtered and found.
● Collection and category structure. Decide how products group together — by type, by use case, by collection drop — before building a single collection page, since restructuring this after launch means redoing navigation, filters, and potentially your SEO.
● Navigation and menu planning. Map the full menu structure against your actual catalogue size — a mega-menu makes sense at 500 SKUs and looks empty at 20.
● URL structure decisions. Shopify’s default URL structure (/products/product-handle, /collections/collection-handle) is generally clean, but the collection and product handles themselves are worth deciding deliberately, since changing them after launch means setting up redirects to avoid losing any SEO value that’s accumulated.
● Planning for scale: metafields and tags. Metafields let you attach structured custom data to products (materials, care instructions, technical specs) that both your theme and apps can use consistently — deciding this structure before loading products saves a full data re-entry pass later.
Stage 5 — UI/UX and Theme Design
This is where the Shopify theme design or store’s UX (how it’s structured to be usable — building on the information architecture from Stage 4) and UI (how it actually looks — colour, typography, imagery, layout) come together inside a Shopify theme. The two are easy to blur together, but they’re solving different problems: UX is whether a customer can find and buy a product without friction; UI is whether the store looks credible and on-brand while they do it.
Every current Shopify theme should be built on the Online Store 2.0 (OS 2.0) architecture, which lets merchants add, remove, and reorder sections on every page — not just the homepage — directly in the theme editor, without a developer. A JSON template can render up to 25 sections; each section can hold up to 50 blocks (1,250 blocks per template in total), and a theme can contain up to 300 theme blocks overall. Shopify’s newer Horizon theme family also supports theme blocks, an additional layer of merchant-controlled nested customisation within sections, on top of standard OS 2.0 capability.
● Free vs. premium vs. fully custom. Free themes (Dawn, Horizon) are genuinely capable and fast by default; premium themes from the Shopify Theme Store add pre-built layouts and merchandising features that would otherwise need custom development; a fully custom theme removes template constraints entirely but costs the most and takes the longest to build (see the cost and timeline sections below).
● Mobile-first design. The majority of Shopify traffic and Google’s ranking evaluation are both mobile-first — design and review every page on a phone screen first, desktop second.
● Branding consistency. Carry your visual identity through the theme, the checkout (branding, colours, and logo are customizable even on non-Plus plans), and transactional emails — a store that looks polished but sends a generic default order confirmation email undermines the trust it just built.
Stage 6 — Development and Customisation
This is the stage most guides treat as the entire project, but it’s most efficient when the architecture (Stage 4) and design (Stage 5) decisions are already settled, so development is execution rather than ongoing decision-making.
● Liquid customization basics. Most visual and layout customisation happens through section and block editing within a theme’s existing architecture, using Shopify’s Liquid templating language for anything beyond what the theme editor’s settings panel exposes.
● Apps vs. custom code. Default to an existing app for common functionality (reviews, upsells, loyalty) and reserve custom code for functionality that’s genuinely specific to your business — building custom what an app already solves well is a common source of unnecessary cost and future maintenance burden.
● Features that typically require a developer. Custom checkout logic (Shopify Plus), complex product configurators, non-standard filtering logic, and API-level integrations with external systems generally sit outside what theme customisation alone can deliver.
● Performance considerations during development, not after. Every added app and every custom script has a performance cost. Building with page speed in mind from the start — lazy-loading below the fold, minimising render-blocking scripts, sizing images correctly — is far cheaper than a dedicated speed-optimisation pass after launch.
Stage 7 — Apps and Integrations
Shopify’s App Store covers thousands of tools, but the core categories most stores actually need are: reviews (Judge.me, Loox), email/SMS marketing (Klaviyo, Shopify Email), customer support (Shopify Inbox), and basic conversion tools (upsells, cart recovery).
● Payment, shipping, and tax integrations. Confirm these are configured and tested before Stage 9, not discovered as missing during QA.
● ERP, POS, and inventory integrations. These are the integrations most likely to be underestimated in initial scoping — authentication, data syncing, and automation rules for ERP or logistics integrations commonly add real cost and time beyond a standard store build, so they should be flagged explicitly back in Stage 2.
● Avoiding app bloat. Every installed app adds JavaScript that loads on your storefront, whether or not it’s actively used. A useful discipline: for every app installed, note what business problem it solves, and periodically audit and remove ones that no longer earn their performance cost.
Stage 8 — Content, Product Data, and SEO Foundation
Product photography is consistently the most under-prepared part of a launch — founders spend weeks on theme selection, then upload inconsistent phone photos at the last minute. Every product image should meet a consistent standard: clean background, adequate resolution, and consistent framing across the whole catalogue.
● Collections, filters, and metafields. This is where the Stage 4 architecture decisions get executed in practice — loading real product data into the structure that was planned, not improvised.
● On-page SEO basics. Unique title tags (under 60 characters) and meta descriptions (under 155 characters) on every key page — homepage, collections, and products — written with your primary keyword included naturally, not stuffed. Shopify auto-generates these from product and page titles, but the defaults are rarely what you’d actually want Google to show.
● Technical SEO checklist before launch. Redirects mapped for any URLs carried over from a previous site, an XML sitemap submitted to Google Search Console, and basic structured data (Product schema) in place — Shopify doesn’t add rich product or organisation schema by default, so this typically needs an app or developer, as covered in more depth in our earlier guide’s SEO section.
Stage 9 — Testing and Quality Assurance
QA is where most rushed launches fail visibly, because problems that were invisible during development — a broken discount code, a shipping rate that doesn’t appear for a valid address — surface the moment a real customer hits them.
● Functional testing. A complete test order using a real (test-mode) payment method, checking the discount code field, cart quantity changes, and every automated email (order confirmation, shipping notification, abandoned cart) actually sends and reads correctly.
● Cross-device and cross-browser testing. Test on actual mobile devices, not just a browser’s device emulator — rendering and touch-interaction bugs frequently don’t show up in emulation.
● Performance and Core Web Vitals testing. Google’s three Core Web Vitals thresholds are Largest Contentful Paint (LCP) under 2.5 seconds, Interaction to Next Paint (INP) under 200 milliseconds, and Cumulative Layout Shift (CLS) under 0.1. Shopify’s own Web Performance dashboard (Online Store > Themes > Performance) reports real-user Core Web Vitals data once your store’s password is removed, based on the last 90 days, though results can take up to 36 hours to reflect changes.
Independent research testing a large sample of live Shopify stores has found that well under half pass all three thresholds on mobile, with third-party app scripts as the most common cause — so this is a genuine area of competitive advantage for stores that test properly before launch, not just an afterthought.
● Test every app integration end-to-end, not just that it’s installed — trigger the abandoned cart flow with a real test email, confirm review-request emails send after a test order, and check for visual conflicts when two apps modify the same part of the page (like the cart drawer).
Stage 10 — Pre-Launch Checklist
● Legal pages and policies. Privacy policy, terms of service, shipping policy, and returns/refund policy are published and linked in the footer — both a trust signal and, in many jurisdictions, a compliance requirement.
● Analytics and tracking setup. GA4 (or your chosen analytics platform) must be installed and verified to be tracking correctly before launch — data from the first weeks of traffic can’t be recovered retroactively if tracking wasn’t live.
● Marketing and email capture readiness. A working email signup, tested discount codes if you’re offering a launch incentive, and social accounts connected if relevant.
● Final review before removing the password page. Walk through the entire storefront on both mobile and desktop one more time, checking for placeholder content, broken links, and unfinished sections, before the store becomes publicly visible.
Note Google’s own indexing timeline here: search engines can take 48 to 72 hours to index new pages after launch, and not all pages are guaranteed to be indexed immediately — a detail worth knowing so you don’t mistake normal indexing lag for a technical problem on launch day.
Stage 11 — Launch Day
What to expect: a properly prepared launch is largely uneventful from a technical standpoint, because the real risk was already addressed in Stages 9 and 10. The most common remaining launch-day issues are last-minute billing information not being finalised (your free trial needs active billing details before you can process real orders) and small content issues that only become visible once real customers start browsing, rather than the team that built the store.
Announcing the launch works best across multiple channels at once — an email to anyone who signed up during pre-launch, posts across your active social platforms, and direct outreach to your personal and professional network. Treat the first 24 hours as an opportunity to engage personally with every comment and question; this early responsiveness is disproportionately valuable for a brand-new store with no track record yet.
Stage 12 — Post-Launch Monitoring and Early Fixes
The global average online shopping cart abandonment rate is roughly 70% across e-commerce generally, so don’t treat early abandoned checkouts as a sign something is broken — it’s the normal baseline you’re working to improve, not a launch failure.
● What to watch in the first 30 days. Checkout completion rate, mobile vs. desktop conversion split, page-load performance on your top product and collection pages specifically (not just the homepage), and support inbox volume for recurring customer questions that point to a UX gap.
● Common early-stage fixes. Cart abandonment triggers (an email flow, not just hoping customers return), any mobile-specific issues that only surface under real traffic patterns, and page speed regressions caused by an app installed after the pre-launch QA pass.
● Setting up a feedback loop. A short post-purchase survey or a simple feedback prompt on the order confirmation page turns your first real customers into a source of prioritisation data, rather than guessing what to fix next.
Post-Launch Support: Structuring the Relationship, Not Just the Fixes
Monitoring tells you what needs fixing; support is the arrangement that determines how quickly it actually gets fixed. This should be settled before launch, not negotiated for the first time when something breaks — see the full breakdown of SLAs, response-time expectations, and retainer vs. pay-as-you-go models in our Shopify hiring guide’s support section.
At a minimum, confirm three things going into launch: who’s responsible for fixes (the original developer/agency, a new maintenance provider, or in-house), what response time is realistic for a critical issue like a broken checkout versus a minor visual bug, and whether that coverage is a fixed monthly retainer or billed as issues come up.
Timeline: How Long Each Stage Realistically Takes
| Store Type | Discovery & Planning | Design & Development | Total to Launch |
| Basic templated store | 1–2 Days | 3–7 Days | 1–2 weeks (minimum operational launch) to 2–6 weeks (fully optimized) |
| Custom theme / mid-size store | 1–2 Weeks | 3–8 Weeks | 4–10 Weeks |
| Migration from another platform | 2–3 Weeks | 3–8 Weeks | 4–10 Weeks, plus SEO recovery time post-launch |
| Shopify Plus/enterprise build | 2–4 Weeks | 8–20+ Weeks | 3–6 Months |
These are planning ranges, not guarantees — actual timelines depend heavily on catalogue size, integration complexity, and how quickly content (photography, copy) is delivered, which is frequently the actual bottleneck rather than development itself.
Cost: What Each Stage Actually Costs, and Where Budgets Break
Development cost benchmarks — covered in full detail, with rate breakdowns by experience level and region, in our companion hiring guide — run roughly from $500 for a small theme customisation to $150,000+ for a full Shopify Plus enterprise build with custom checkout and ERP integration. Layered on top of pure development cost:
● Content production (photography, copywriting) is routinely under-budgeted relative to development costs, despite being equally visible to customers.
● App subscriptions stack up monthly — $10–$100+/month per app once free tiers are outgrown — and rarely get modelled as an ongoing cost during initial budgeting.
● Integration complexity (ERP, POS, custom shipping logic) is the single most common source of mid-project budget overrun, because it’s frequently under-scoped at the discovery stage rather than the development stage itself.
● Post-launch support and maintenance, covered in the hiring guide, is a recurring cost that’s easy to forget when budgeting only for the initial build.
Where budgets most commonly break: businesses budget carefully for the development quote and then treat everything else — content, apps, integrations, and post-launch support — as an afterthought, when in practice these frequently add up to more than the base development cost by the time a store is genuinely launch-ready.
Where This Process Differs by Store Type
● Template store (new, simple catalogue). Stages 4–6 compress significantly — architecture is close to Shopify’s defaults, and theme customisation replaces custom development. Discovery can be a few focused hours rather than a formal workshop.
● Fully custom build. Stage 4 (architecture) and Stage 5 (design) expand significantly, since there’s no existing template constraining decisions — this is where a dedicated strategist or UX role earns its cost.
● Migration from another platform. Stage 1 and Stage 8 both expand: Stage 1 needs a technical audit of the existing site (what’s ranking, what’s driving traffic), and Stage 8 needs careful redirect mapping so existing SEO value isn’t lost — this is one of the highest-risk points in the entire process if rushed.
● Shopify Plus / Enterprise. Stage 0 expands into a longer, more structured discovery process, often involving IT, commercial, and operations stakeholders together, precisely because Shopify Plus unlocks constraints (custom checkout, Shopify Functions, multi-store architecture) that are worth scoping carefully before committing — mis-scoped Plus builds are expensive to redirect mid-project.
Mistakes That Derail the Process
● Skipping discovery and jumping straight to design. The most common process failure — it feels like progress, but it means every downstream decision is being made on assumptions rather than on defined goals.
● Designing before defining architecture. Choosing a theme before deciding how collections and navigation should work forces the architecture to bend around the theme’s defaults rather than your actual catalogue.
● Under-investing in product photography and copy. Development can be technically flawless and still underperform if the content layer wasn’t given proportional attention and budget.
● Treating SEO as a post-launch task. URL structure, redirects, and metadata are far cheaper to get right before launch than to retrofit afterwards, especially on a migration.
● Skipping QA and launching untested. The gap between “looks finished” and “is actually ready for a paying customer” is exactly what Stage 9 exists to close — skipping it means customers find the bugs instead of the team.
What Happens After Launch: Turning the Store Into a Growing Business
Launch is the beginning of the store’s life, not the end of the project. Conversion rate optimisation — testing checkout friction, product page layout, and merchandising decisions against real customer behaviour — is ongoing work, not a one-time task. Content and SEO growth compounds over months, not days, so a realistic growth plan treats the first few months post-launch as the start of that curve, not evidence that it isn’t working.
As order volume grows, revisit decisions made early for a smaller catalogue or lower traffic — the app stack, the Shopify plan tier, and even the original theme choice may need to scale alongside the business rather than being treated as permanent decisions made once at Stage 3 and Stage 5.
Final Verdict: What Separates a Smooth Launch From a Rushed One
The stores that launch smoothly aren’t necessarily the ones with the biggest budget or the most experienced developer — they’re the ones where every stage in this guide got genuine attention, not just the visually obvious ones (design, development). Discovery and architecture decisions made early are cheap to get right and expensive to unwind later; content and QA are easy to under-budget precisely because they don’t look like “the build” the way development does.
If you take one thing from this guide, treat the full thirteen-stage process spanning Stages 0 to 12, as the actual project, not the theme-and-development stretch in the middle of it. Budget time and money across the whole sequence, define what “done” means before you start, and test properly before you remove the password page. That’s what separates a store that launches once and struggles from one that launches ready to actually grow.
Planning a Shopify build and want a second opinion on your scope, timeline, or budget before you start? Softhunters offers full-cycle Shopify development, from discovery through post-launch support, for businesses that want the process done right the first time.
Frequently Asked Questions
How long does it take to build a Shopify store?
While the core layout of a basic templated store can be built in a few days, a functionally complete launch—including live payment gateway approvals, custom domain setup, product asset loading, legal policies, and foundational SEO—realistically takes 2–6 weeks for a standard storefront.
How much does it cost to develop a Shopify store?
Costs scale with complexity: roughly $500–$15,000 for theme customisation, $5,000–$30,000+ for custom app or integration work, and $20,000–$150,000+ for a full Shopify Plus enterprise build — plus content production, app subscriptions, and ongoing support that are frequently under-budgeted. Shopify development pricing varies widely by geography, agency size, and project scope.
Do I need a developer to build a Shopify store?
Not necessarily. Many tasks — product setup, basic theme customisation through the theme editor, shipping and tax configuration — are genuinely DIY-friendly using Shopify’s own tools. A developer becomes necessary for custom Liquid work, API integrations, and anything beyond what theme settings and existing apps can deliver.
What’s the difference between a template store and a custom-built store?
A template store customises an existing Online Store 2.0 theme (like Dawn or a premium Theme Store option) within its existing section and block architecture. A custom-built store removes those template constraints entirely, requiring more design and development work in Stages 4–6, at correspondingly higher cost and timeline.
Can I make changes after launch without a developer?
Yes, for a meaningful range of changes. Online Store 2.0’s section-and-block editor lets merchants add, remove, and reorder content on any page directly through the theme editor without touching code. Changes beyond what the theme editor exposes — new custom functionality, deeper Liquid customisation — still need developer involvement.
What’s the most commonly skipped step in the process?
Discovery (Stage 0) and dedicated QA (Stage 9) are the two most commonly skipped or rushed stages, and not coincidentally the two most correlated with launch problems — one because it doesn’t feel like visible progress, the other because it happens right when everyone is eager to just go live.